

The quest for a fuller, more defined pout has led to the revival of one of the most effective techniques in the makeup artist’s arsenal: overlined lips. While the trend found mainstream fame through the 90s supermodel era and later via social media icons, the modern approach to overlining is more sophisticated than ever. It is no longer about drawing a conspicuous circle around the mouth; it’s about strategic sculpting, color theory, and light manipulation.
When done correctly, overlined lips can balance facial symmetry, provide a youthful lift, and give the illusion of volume without the need for clinical procedures. In this guide, we will explore the professional techniques, tools, and common pitfalls involved in mastering the art of the enhanced lip.
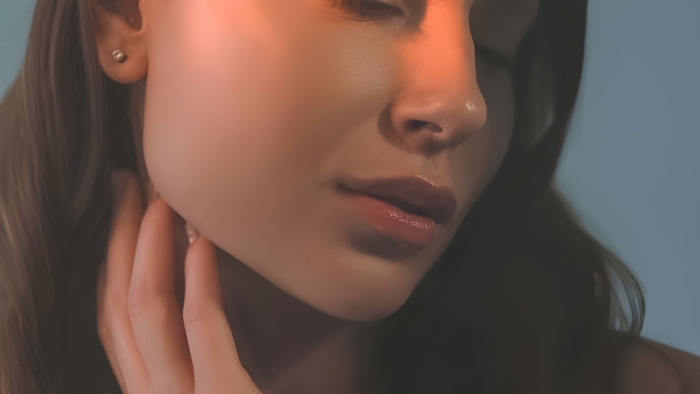
The Anatomy of the Perfect Overline: Where to Draw the Line
The most common mistake beginners make is overlining the entire mouth equally. This often results in a “clownish” or unnatural appearance. To achieve a realistic look, you must understand the anatomy of your lips—specifically the vermilion border (the pale line where your lip meets your skin) and the Cupid’s bow.
- The Center Focus: Professional artists suggest only overlining the “peaks” and “valleys.” This means you should slightly overdraw the center of the Cupid’s bow and the very center of the bottom lip.
- The Tapered Corner: As you move toward the corners of your mouth, you should follow your natural lip line exactly. If you overline the corners, the mouth can look unnaturally wide or “droopy” when you speak or smile.
- The Flat-Top Technique: A modern variation involves drawing a straight line across the two peaks of the Cupid’s bow rather than following the “V” shape. This creates a pillowy, “Bratz-doll” effect that is currently very popular in editorial photography.
Step-by-Step: A Professional Routine for Voluminous Lips
Achieving a long-lasting, realistic overline requires more than just a pencil. It requires preparation and strategic layering to ensure the line doesn’t smudge or look “flat.”
1. Preparation and Priming
Before applying color, the skin must be smooth. Use a gentle lip scrub to remove any flakes. Apply a thin layer of a non-greasy lip balm and let it absorb. If the lips are too oily, the liner will slide. A pro tip is to apply a tiny bit of concealer or foundation over the edges of your lips to “erase” your natural border, giving you a clean canvas to redefine.
2. Mapping the Shape
Use a sharpened lip liner that is 1–2 shades darker than your natural lip color or your chosen lipstick. Start at the Cupid’s bow and draw two small “peaks.” Then, mark the center of the bottom lip. Connect these points to the corners of your mouth using short, light strokes rather than one continuous line. This mimics the natural texture of the skin.
3. Filling and Contouring
Once the outline is set, don’t leave the center empty. Fill in the outer thirds of the lips with the liner, leaving the very center bare. This creates a contour effect, where the darker edges recede and the lighter center pops forward, adding immediate three-dimensional volume.
4. The Lipstick and Blend
Apply a satin or matte lipstick that is slightly lighter than the liner. Use a small lip brush to blend the liner into the lipstick so there is no visible “stark line.” For the most realistic finish, the transition should be a seamless gradient.
5. The “High-Light” Finish
To maximize the illusion, apply a tiny amount of shimmering highlighter to the skin just above the Cupid’s bow. This catches the light and makes the top lip appear more projected. Finally, a dab of clear gloss on the center of the bottom lip creates a “reflective” point that suggests fullness.
Choosing Your Weapons: Textures and Tools
The success of overlined lips depends heavily on the formula of the products used. A liner that is too creamy will bleed into fine lines, while one that is too dry will tug and look patchy.
- Lip Liners: Look for “long-wear” or “waterproof” wooden pencils. Many artists prefer traditional wooden pencils over mechanical ones because they can be sharpened to a precise point. Brands like MAC Cosmetics are industry standards for their vast range of “nude” shades that mimic natural shadows.
- The “Shadow” Shade: For a truly invisible overline, use a “taupe” or “cool-toned” liner. Because natural shadows under the lip are cool-toned (greyish-brown), a warm pink liner can often look obvious. Cool tones trick the eye into seeing a physical shadow cast by a fuller lip.
- Clean-up Tools: Keep a flat concealer brush and a tiny bit of skin-matching concealer nearby. If your line is too shaky or you’ve overdrawn too far, you can “carve out” the lip line to make it look razor-sharp and intentional.
Common Pitfalls and How to Avoid Them
The line between “glamorous” and “messy” is thin when it comes to overlining.
- Over-drawing the Corners: As mentioned, this makes the mouth look heavy. Always return to your natural line as you approach the outer edges.
- Using the Wrong Light: Always check your lips in natural daylight. Artificial yellow light can hide the fact that your liner doesn’t match your skin tone or that the line is too thick.
- Ignoring the Texture: If you have very dry lips, matte liners will accentuate every crack. In this case, opt for a “satin” finish and use a lip-plumping gloss to smooth out the surface area.
- The “Ghost” Line: This happens when the lipstick wears off, leaving only the dark outer ring. To prevent this, always fill in the entire lip with the liner first to create a “stain” that stays even if the lipstick fades.
Conclusion: Confidence in Every Stroke
Overlined lips are a powerful tool in any beauty routine, offering a customizable way to play with facial proportions and express personal style. Whether you are going for a 90s-inspired brown lip or a soft, romantic pink pout, the key is subtlety and blending. By focusing on the center of the mouth and using cool-toned shadows, you can achieve a look that is both striking and convincingly natural.